'xyPoint System' is a plotting system which allows adding points on a canvas which suports the following scales: 'Log' scale, 'Simple' scale and 'Measurement Unit' scale. The application allows for a variety of operations like adding points to the canvas, moving points, removing points, editing how the coordinates are seen, exporting point coordinates in a free form using built-in parameters and your own text plus many other operations. There is no limit to the number of points you can add to the canvas.

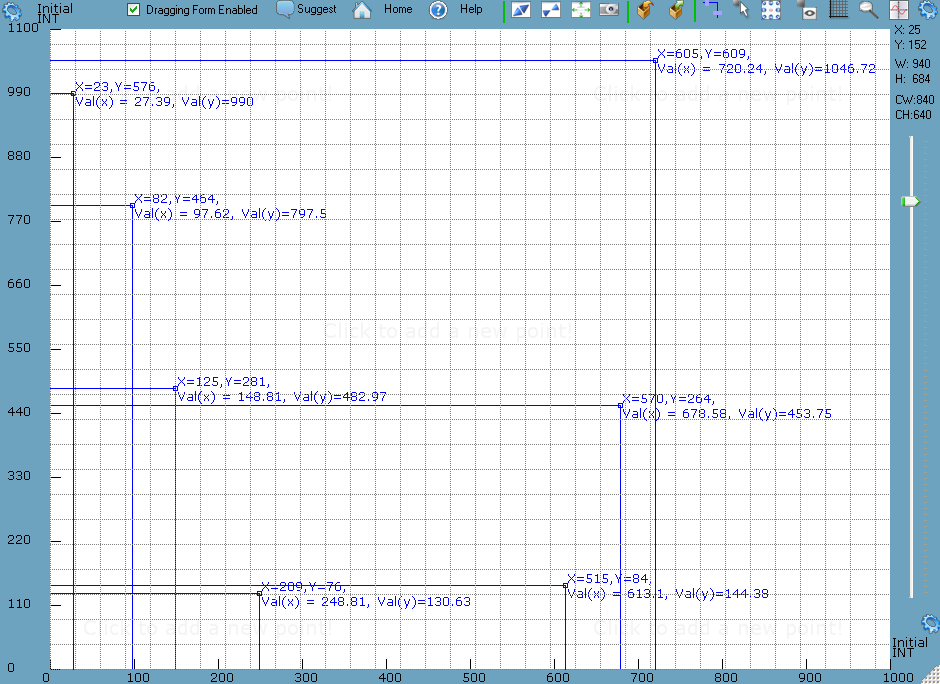
plot points on the canvas by clicking in the white area
Points can be added to the canvas by simply clicking anywhere inside the white area. To easily remove the last point added you need to press CTRL + Z.
Each time you press CTRL + Z, the points are removed from the canvas in the reversed order they were added.
There is no limit to the number of points you can add to the canvas (in the unlocked version). The trial version has a 5 point per canvas limit (you can have an unlimited number of canvas windows).
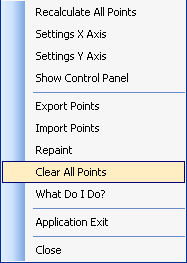
To remove the points, right click the canvas anywhere and select 'Clear All Points':
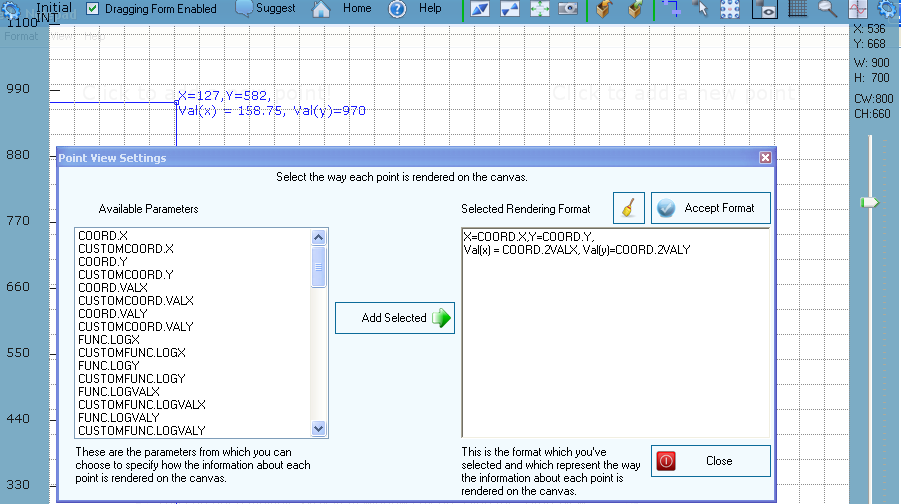
edit the way point coordinates are rendered. You can use the built-in parameters to specify the rendering. Here are a few parameters you can use: CUSTOMCOORD.X{0:E}, CUSTOMCOORD.Y{0:E}, COORD.X, COORD.Y, COORD.VALX, COORD.VALY (plus many more).
To edit the way the point coordinates are rendered you need to press the

button which will pop-up the "Point View Settings" window.
You can select any of the available parameters from the left side list of parameters
and
add them to the right side text box. In this text box you can enter your own words and phrases which together with the built-in parameters allow you build your own freeform format for rendering the point coordinates.
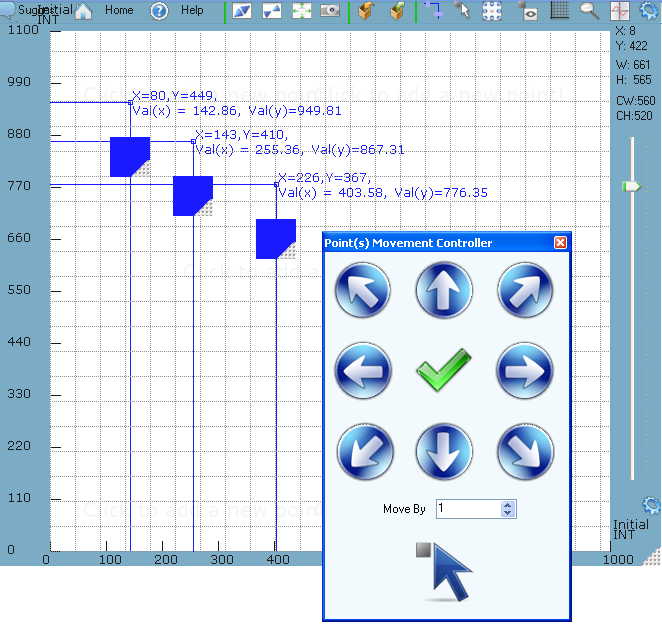
delete or move points around the canvas either by selecting them or using the attached controller (the attached controller can be a rectangle, triangle or a circle)
You can select a set of points on the canvas by drawing a rectangle which would contain all of them.
To start the selection process you need to press this button:

and then you can draw the rectangle.
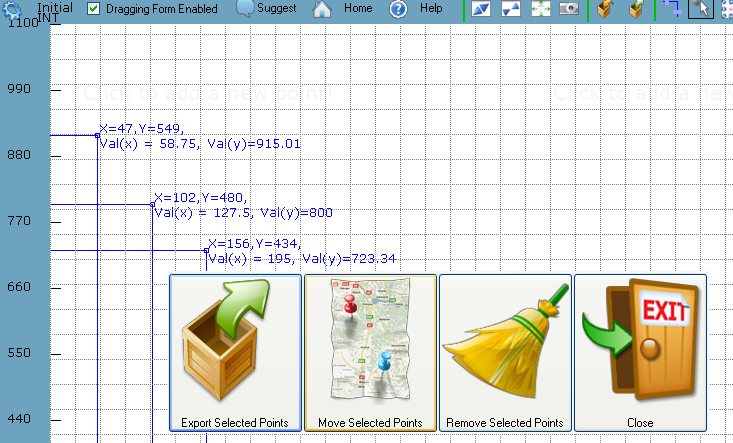
Once the points are selected there is a pop-up window showing up allowing three operations:
-
'Export Selected Points' - to export the selected points to a file
-
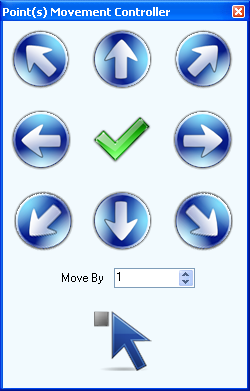
'Move Selected Points' - a new pop-up window called 'Point(s) Movement Controller' will show up allowing to move the selected points. This window has arrow buttons to indicate the direction where each point will be moved.
You can see this pop-up window below.
-
'Remove Selected Points' - removes the selected points from the canvas
Here is the 'Point(s) Movement Controller' pop-up window. The arrow button at the bottom of the window allows selecting a new set of points to be moved.
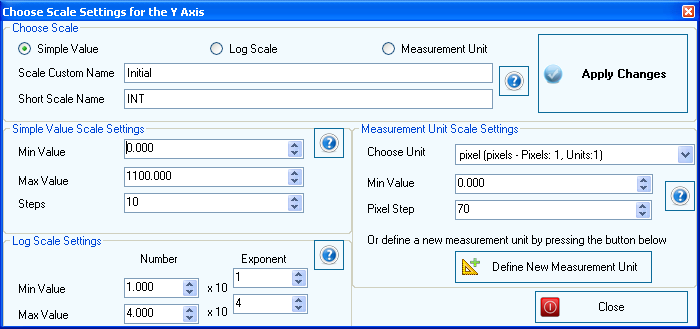
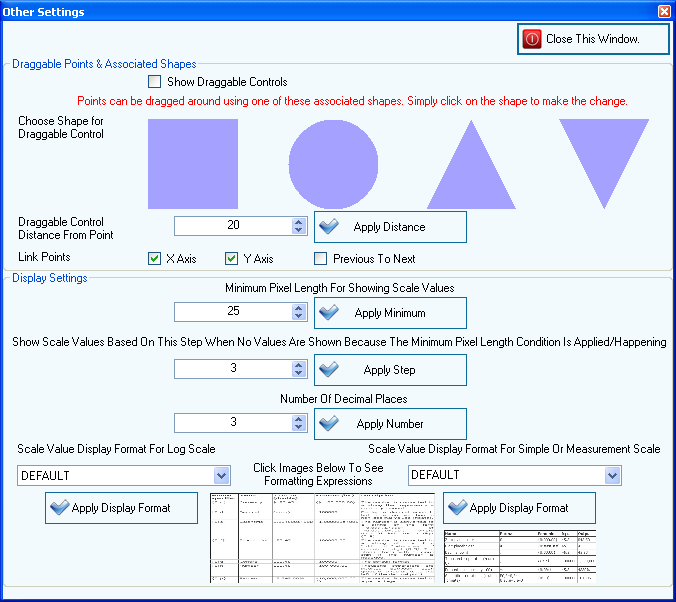
choose between three types of scales: "Log" scale, "Simple" scale and "Measurement Unit" scale to show for the X or Y axis. You can even define your own customer measurement units to use with the "Measurement Unit" scale
To choose between the existing scales you need to press the

button found at the top left of the canvas window (for the Y axis)
or the
button found at the bottom right of the canvas window (for the Y axis).
This will show the 'Choose Scale' pop-up window, please see below. Then you can choose a scale by pressing the associated radio-button at the top of the window.
When:
-
'Simple Value' scale is selected: at the bottom of the scale there will be Min value
and at the top there will be Max value. The number of regions between the Min value
and Max value is given by the 'Steps' field.
-
'Log' scale is selected: at the bottom of the scale there will be the immediate 10^(x) which is lower
or equal to Min^(MinExponent) and at the top of the scale there will be the immediate 10^(y) which is higher
or equal to Max^(MaxExponent).
-
'Measurement Unit' scale is selected: you can select a unit of measurement as the Scale for either axis (X or Y).
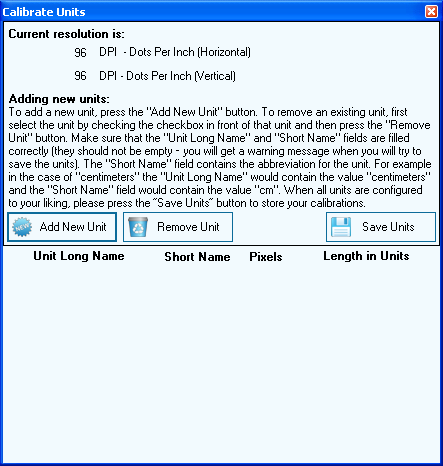
There are predefined units of measurement that come packaged with the application and you can also define your own new units of measurement.

When you press the 'Define New Measurement Unit' button the following pop-up window will be shown.
To add a new unit, press the "Add New Unit" button. To remove an existing unit, first select the
unit by checking the checkbox in front of that unit and then press the "Remove Unit" button.
Make sure that the "Unit Long Name" and "Short Name" fields are filled correctly
(they should not be empty you will get a warning message when you will try to save the units).
The "Short Name" field contains the abbreviation for the unit. For example in the case of "centimeters"
the "Unit Long Name" would contain the value "centimeters" and the "Short Name" field would contain the value "cm".
When all units are configured to your liking, please press the Save Units button to store your calibrations.
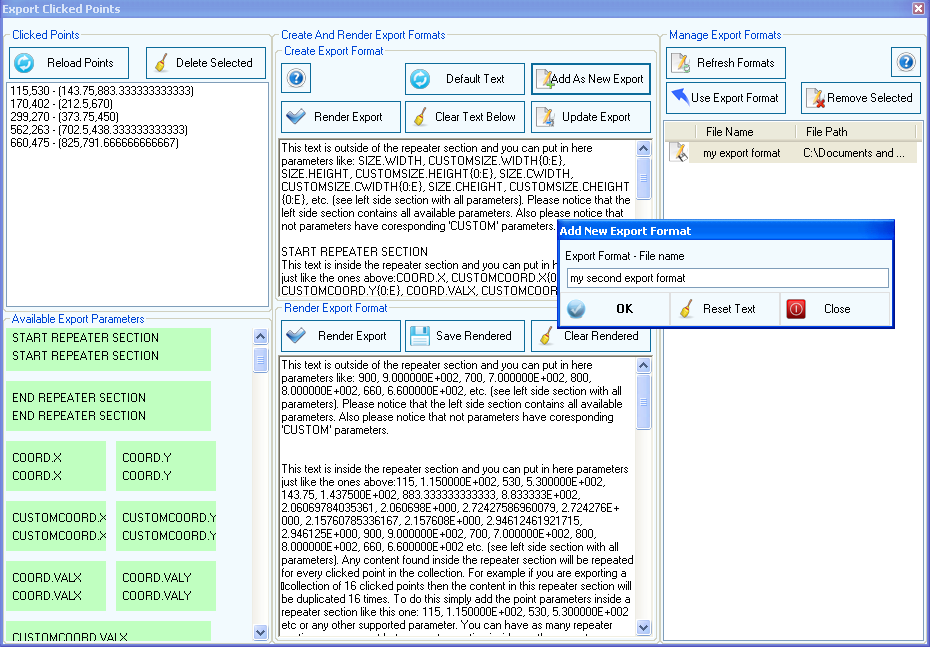
export all points coordinates using your own words (and phrases) and the built-in parameters. You can even build your own export formats and save them for further use
You can create export formats using the built-in parameters and your own words and phrases.
You can even save your export formats to be used later on. There are a lot of built-in parameters to be used, please see
the bottom left section in the snapshot below ('Available Export Parameters').
In order to create an export format you need to edit the top text box using your own words and phrases including the built-in parameters
and then when you hit the 'Render Export' button, the export format will be rendered based on the existing points.
The application already comes with a predefined export format which you can edit further.
To revert to the default export format you need to press the 'Default Text' button.
drag the canvas by grabbing it from anywhere (you can disable dragging by making sure the "Dragging Form Enabled" check box is un-checked)
create a snapshot of the entire application window
You can use the

button to create a snapshot of the entire canvas window.
change opacity of the canvas window
You can use the right side slider to change the opacity of the canvas window.
Changing the opacity is usefull when you want the canvas window to be on top of a picture or a drawing and want to see partially the underlying content.
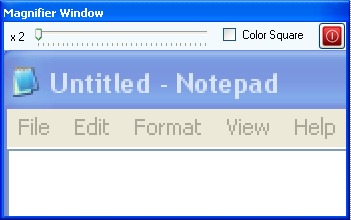
use the built-in magnifier
You can use the

button to access the built-in magnifier:
show or hide the grid in the canvas
You can use the

button to show or hide the grid.


 works on Windows XP, Vista and Windows 7 - both 32 and 64 bit